一、CocoaPods 插件机制
① Ruby
- 在 Ruby 中,类永远是开放的,总是可以将新的方法加入到已有的类中,除了自己的代码中,还可以用在标准库和内置类中,这个特性被称为 Ruby Open Classes。
- 自定义一个类 Human,放在 human.rb 文件中:
class Human
    def greeting
        puts "hello everybody"
    end

    def hungry
        puts "I am hungry"
    end
end
require_relative 'human'

john = Human.new

john.greeting
# hello everybody

john.hungry
# I am hungry
- 再在 main.rb 中重新定义 hungry 方法:
class Human
    def hungry
        puts "I could eat a horse"
    end
end

john.hungry
# I could eat a horse
- 可以看到,在新增 hungry 方法之后,所有的 Human 类的实例均调用新的实现,即使是已经创建好的实例,这里故意放到两个文件中是想说明这个特性是可以跨文件甚至跨模块的,对 Ruby 内置方法的替换也是可以的(谨慎使用)。
puts "hello".size

class String
    def size
        puts "goodbye"
    end
end

# 5
# goodbye
puts "hello".size
- 这个特性是十分强大的,让我们可以很容易的对三方模块进行扩展,也是 Cocoapods 的插件体系所依赖的基础。
② CocoaPods 流程分析
- 首先,Cocoapods 提供了一个便捷的命令行工具库 CLAide,CLAide 包含很多功能,例如,一套命令基类,一套插件加载机制等。
- Command 基类在 lib/claide/command.rb 中,提供了大量基础功能,包括 run 、 options、 help 等。当每次执行 pod xxx 命令时候,会执行 bin 目录下的可执行文件 pod:
require 'cocoapods'

if profile_filename = ENV['PROFILE']
    # 忽略不相关内容...
else
    Pod::Command.run(ARGV)
end
- 这里实际上是 Pod 模块从 CLAide 继承子类 Command < CLAide::Command,执行 Pod 命令时候,就会调用:
def self.run(argv)
    help! 'You cannot run CocoaPods as root.' if Process.uid == 0

    verify_minimum_git_version!
    verify_xcode_license_approved!

    super(argv)
ensure
    UI.print_warnings
end
- 实际上只是扩展了一些检测 git 版本、Xcode 证书等,真正核心部分还是调用的 CLAide 的实现:
def self.run(argv = [])
    plugin_prefixes.each do |plugin_prefix|
        PluginManager.load_plugins(plugin_prefix)
    end

    argv = ARGV.coerce(argv)
    command = parse(argv)
    ANSI.disabled = !command.ansi_output?
    unless command.handle_root_options(argv)
        command.validate!
        command.run
    end
rescue Object => exception
    handle_exception(command, exception)
end
- 可以看到这里真正执行命令之前会遍历所有的插件前缀,并进行插件加载,回头来再查看 cocoapods/command.rb 会发现,这里指定了约定的插件前缀:
self.plugin_prefixes = %w(claide cocoapods)
- 可以看到这里的插件分为两种,我们目前只关心文件名为 CocoaPods 前缀的插件。深入 PluginManager 的具体实现看下:
def self.load_plugins(plugin_prefix)
    loaded_plugins[plugin_prefix] ||=
    plugin_gems_for_prefix(plugin_prefix).map do |spec, paths|
        spec if safe_activate_and_require(spec, paths)
    end.compact
end

def self.plugin_gems_for_prefix(prefix)
    glob = "#{prefix}_plugin#{Gem.suffix_pattern}"
    Gem::Specification.latest_specs(true).map do |spec|
        matches = spec.matches_for_glob(glob)
        [spec, matches] unless matches.empty?
    end.compact
end

def self.safe_activate_and_require(spec, paths)
    spec.activate
    paths.each { |path| require(path) }
    true
    # 不相关代码略去
    # ...
end
- 只分析核心相关代码,整体的流程大致是:
-
- 调用 PluginManager.load_plugins 并传入插件前缀;
-
- PluginManager.plugin_gems_for_prefix 对插件名进行处理,取出需要加载的文件,例如 CocoaPods 前缀在这里会转换为所有包含 cocoapods_plugin.rb 的 gem spec 信息及文件信息,例如 ~/cocoapods-qt/lib/cocoapods_plugin.rb;
-
- 调用 PluginManager.safe_activate_and_require 进行对应的 gem spec 检验并对每个文件进行加载。
③ Cocoapods-plugins
- 执行 pod plugins create cocoapods-test 之后,发现自动创建了一个 gem 工程,其中的 lib 文件夹下果然存在一个 cocoapods_plugin.rb 文件,整体的目录结构如下:
├── Gemfile
├── LICENSE.txt
├── README.md
├── Rakefile
├── cocoapods-test.gemspec
├── lib
│   ├── cocoapods-test
│   │   ├── command
│   │   │   └── test.rb
│   │   ├── command.rb
│   │   └── gem_version.rb
│   ├── cocoapods-test.rb
│   └── **cocoapods_plugin.rb**
└── spec
    ├── command
    │   └── test_spec.rb
    └── spec_helper.rb
- 这里最核心的就是 cocoapods_plugin.rb,前面分析过,执行 pod 命令时候会主动加载所有 cocoapods_plugin.rb 文件,那么只要将需要扩展的类加到这里面,执行命令时候就会生效:
class Test < Command
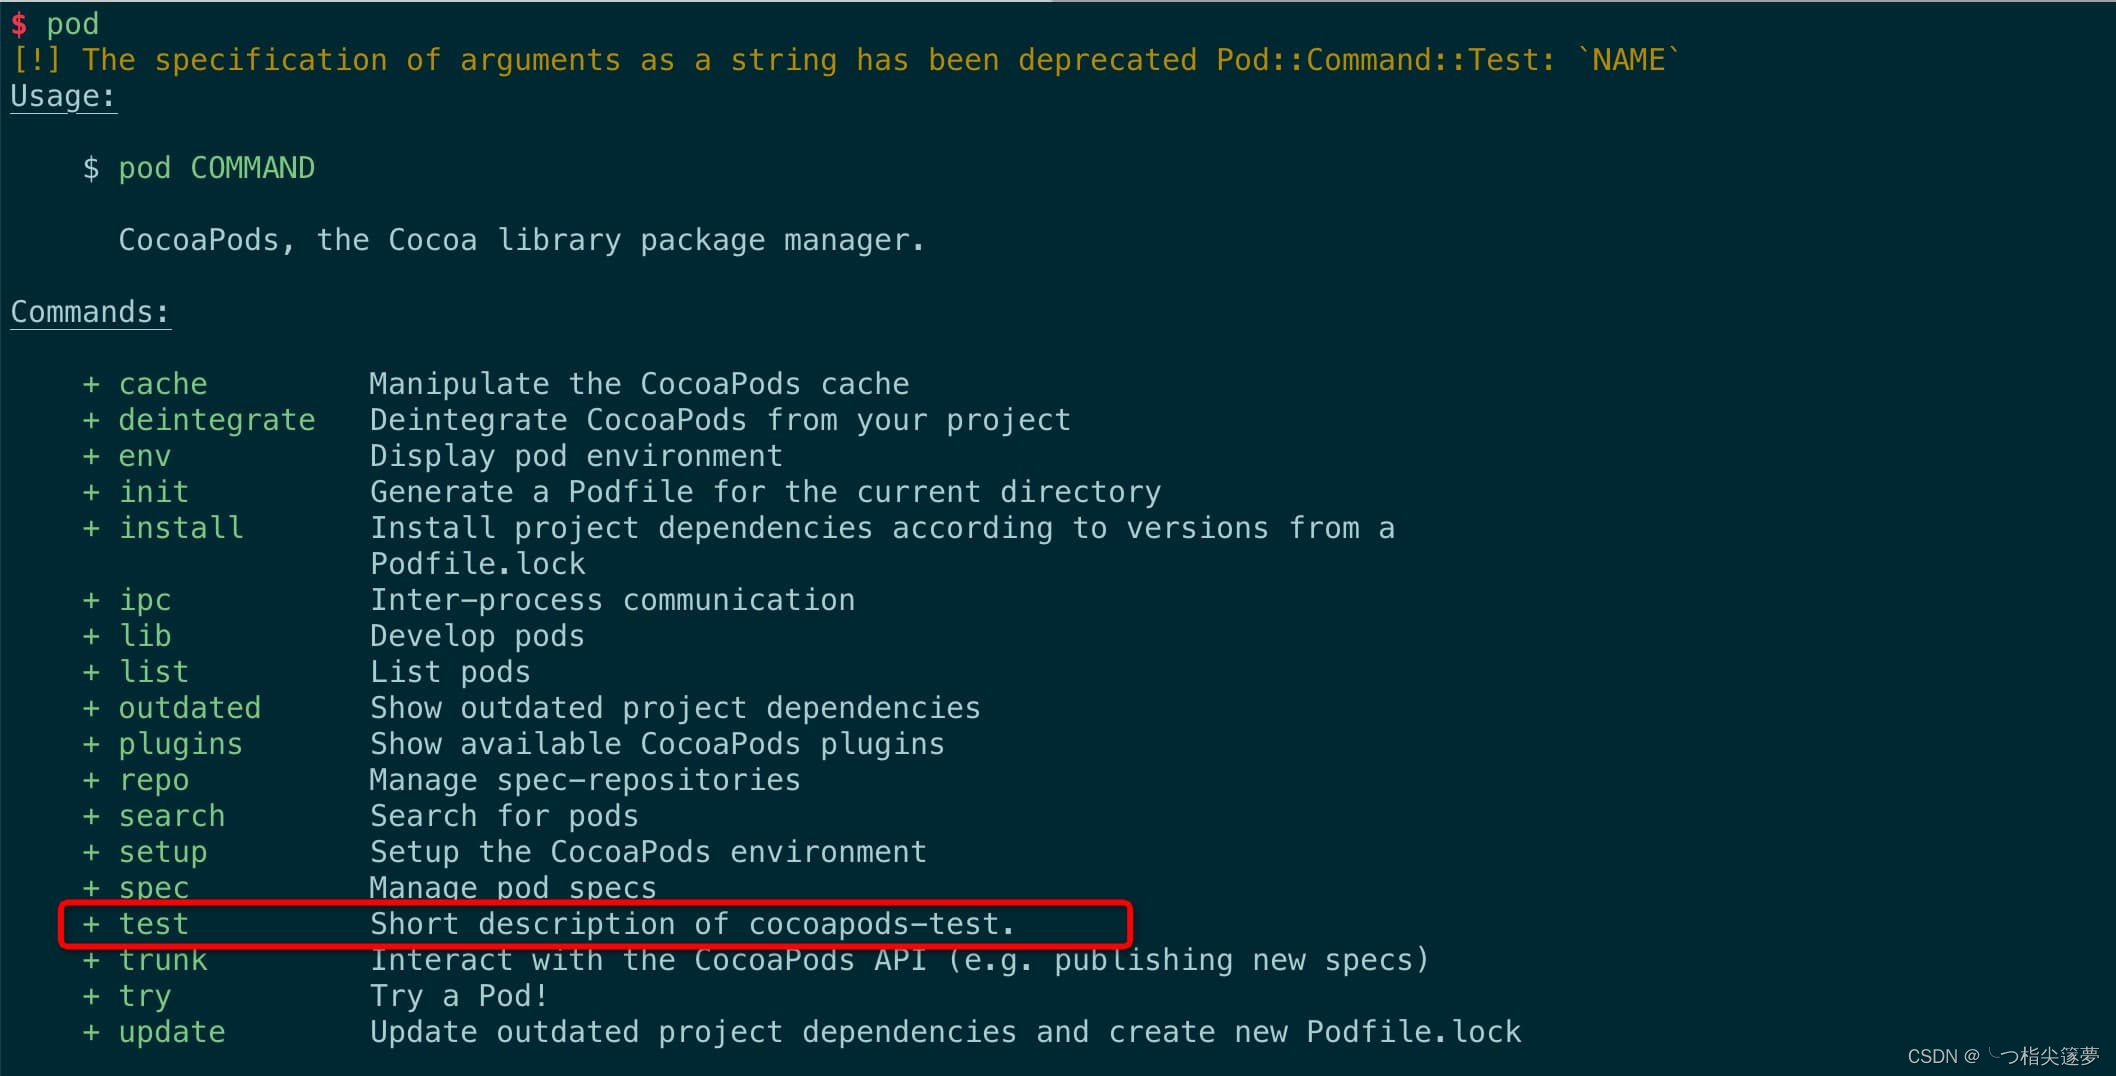
self.summary = 'Short description of cocoapods-test.'
self.description = <<-DESC
Longer description of cocoapods-test.
DESC
self.arguments = 'NAME'
def initialize(argv)
@name = argv.shift_argument
super
end
def validate!
super
help! 'A Pod name is required.' unless @name
end
def run
UI.puts "Add your implementation for the cocoapods-test plugin in #{__FILE__}"
end
end
- 可以看到只是新增了一个 Test 命令,并加了一些描述信息。为了扩展能生效,可以通过几种方式:
-
-
- 为了更贴近实际生产发布流程,可以采用第二种方式:
-
gem build cocoapods-test.gemspec
gem install ~/CocoapodsQt/cocoapods-test/cocoapods-test-0.0.1.gem --local
- 可以看到扩展的命令已经生效,接下来就可以开始愉快的 coding。
二、CocoaPods 如何加载插件?
- CocoaPods 为开发者提供了插件注册功能,可以使用 pod plugins create NAME 命令创建插件,并在 Podfile 中通过 plugin ‘NAME’ 语句引入插件。虽然在一般情况下很少使用这个功能,但在某些场景下,利用插件能比较方便快捷地解决问题,比如清除 input,output 文件、创建 Podfile DSL 等。
- 首先,由于 pod install 过程会涉及到插件的加载,因此直接查看 installer.rb 文件:
# Runs the registered callbacks for the plugins post install hooks.
#
def run_plugins_post_install_hooks
  context = PostInstallHooksContext.generate(sandbox, aggregate_targets)
  HooksManager.run(:post_install, context, plugins)
end

# Runs the registered callbacks for the plugins pre install hooks.
#
# @return [void]
#
def run_plugins_pre_install_hooks
  context = PreInstallHooksContext.generate(sandbox, podfile, lockfile)
  HooksManager.run(:pre_install, context, plugins)
end

# Ensures that all plugins specified in the {#podfile} are loaded.
#
# @return [void]
#
def ensure_plugins_are_installed!
  require 'claide/command/plugin_manager'

  loaded_plugins = Command::PluginManager.specifications.map(&:name)

  podfile.plugins.keys.each do |plugin|
    unless loaded_plugins.include? plugin
      raise Informative, "Your Podfile requires that the plugin `#{plugin}` be installed. Please install it and try installation again."
    end
  end
end
- 其中 run_plugins_pre_install_hooks 和 run_plugins_post_install_hooks 分别执行插件注册的 pre_install 和 pod_install 方法, ensure_plugins_are_installed 则确认插件是否已被安装。
- 接下来看下 Command::PluginManager,这个类在 claide/command/plugin_manager 文件内,属于 claide gem:
# @return [Array<Gem::Specification>] Loads plugins via RubyGems looking
#         for files named after the `PLUGIN_PREFIX_plugin` and returns the
#         specifications of the gems loaded successfully.
#         Plugins are required safely.
#
def self.load_plugins(plugin_prefix)
  loaded_plugins[plugin_prefix] ||=
    plugin_gems_for_prefix(plugin_prefix).map do |spec, paths|
      spec if safe_activate_and_require(spec, paths)
    end.compact
end

# @group Helper Methods

# @return [Array<[Gem::Specification, Array<String>]>]
#         Returns an array of tuples containing the specifications and
#         plugin files to require for a given plugin prefix.
#
def self.plugin_gems_for_prefix(prefix)
  glob = "#{prefix}_plugin#{Gem.suffix_pattern}"
  Gem::Specification.latest_specs(true).map do |spec|
    matches = spec.matches_for_glob(glob)
    [spec, matches] unless matches.empty?
  end.compact
end

# Activates the given spec and requires the given paths.
# If any exception occurs it is caught and an
# informative message is printed.
#
# @param  [Gem::Specification] spec
#         The spec to be activated.
#
# @param  [String] paths
#         The paths to require.
#
# @return [Bool] Whether activation and requiring succeeded.
#
def self.safe_activate_and_require(spec, paths)
  spec.activate
  paths.each { |path| require(path) }
  true
rescue Exception => exception # rubocop:disable RescueException
  message = "n---------------------------------------------"
  message << "nError loading the plugin `#{spec.full_name}`.n"
  message << "n#{exception.class} - #{exception.message}"
  message << "n#{exception.backtrace.join("n")}"
  message << "n---------------------------------------------n"
  warn message.ansi.yellow
  false
end
- 以上代码调用几个的 Gem::Specification 方法如下:
# 获取最新 spec 集合
# Return the latest specs, optionally including prerelease specs if prerelease is true.
latest_specs(prerelease = false)

# 获取 gem 中匹配的文件路径
# Return all files in this gem that match for glob.
matches_for_glob(glob)

# 激活 spec,注册并将其 lib 路径添加到 $LOAD_PATH ($LOAD_PATH 环境变量存储 require 文件时查找的路径)
# Activate this spec, registering it as a loaded spec and adding it's lib paths to $LOAD_PATH. Returns true if the spec was activated, false if it was previously activated. Freaks out if there are conflicts upon activation.
activate()
- 可以看到在 loaded_plugins[plugin_prefix] 为空的情况下,程序会执行 plugin_gems_for_prefix 方法,plugin_gems_for_prefix 方法通过 latest_specs 获取了最新的 spec,并通过 spec 的 matches_for_glob 方法对文件进行匹配,当 spec 中存在匹配 “#{prefix}_plugin#{Gem.suffix_pattern}” 格式的文件时,则视其为 CocoaPods 插件。在拿到插件及其匹配文件后,safe_activate_and_require 方法将文件加入 $LOAD_PATH 中并 require 之。
- 另外 CLAide::Command 类会在 run 类方法中加载所有插件,然后根据解析后的信息,执行对应的命令:
# @param  [Array, ARGV] argv
#         A list of (remaining) parameters.
#
# @return [Command] An instance of the command class that was matched by
#         going through the arguments in the parameters and drilling down
#         command classes.
#
def self.run(argv = [])
  plugin_prefixes.each do |plugin_prefix|
    PluginManager.load_plugins(plugin_prefix)
  end

  argv = ARGV.coerce(argv)
  command = parse(argv)
  ANSI.disabled = !command.ansi_output?
  unless command.handle_root_options(argv)
    command.validate!
    command.run
  end
rescue Object => exception
  handle_exception(command, exception)
end
- 对于通过 pod plugin create 命令创建的插件来说,lib 目录下都会自动生成一个 cocoapods_plugin.rb 文件,这个文件就是用来标识此 gem 为 CocoaPods 插件的。
- 如果想手动创建 CocoaPods 插件,需要满足以下两个条件:
# Handles plugin related logic logic for the `Command` class.
#
# Plugins are loaded the first time a command run and are identified by the
# prefix specified in the command class. Plugins must adopt the following
# conventions:
#
# - Support being loaded by a file located under the
# `lib/#{plugin_prefix}_plugin` relative path.
# - Be stored in a folder named after the plugin.

# - 支持通过 `lib/#{plugin_prefix}_plugin` 路径的文件加载
# (也就是说,如果要对外暴露插件内部存的方法,需要在此文件中 require 之,比如自定义的 Podfile DSL 文件)
# - 保存在以插件命名的文件夹中
- 在 CocoaPods 上下文中,以上的 plugin_prefix 如下:
self.plugin_prefixes = %w(claide cocoapods)
- 如果需要外部 gem 以插件的形式提供某些功能,可以通过和 CocoaPods 一样的方式实现,即规定特定的命名规则,然后通过 Gem::Specification 提供的方法获取满足条件的 gem,再 require 入口文件:
spec = Gem::Specification.find_by_name('naruto')
spec.activate
matches = spec.matches_for_glob('naruto')
matches.each do |path|
  require(path)
end
三、CocoaPods 插件整合开发工具
① Podfile 内声明公有源和私有源 source
- 如果组件化采用公有源和私有源双源的方案,为了 pod install 命令能够找到公有组件和私有组件,需要在 Podfile 里指定双源地址,如:
# 私有源地址
source 'https:
# 公有源地址
source 'https:
- 但存在以下问题:
-
- 如果公司项目存在多个 APP,每个工程都要配置这样两行,各组件 Example 工程也存在这样的问题;
-
- 如果公司 git 换过地址,每次都要更换各个工程里的地址,且导致历史 tag 工程 pod install 失败;
-
- 这次新建 cocoapods-lebby 插件工程,就通过 CocoaPods 提供的 source_provider hook 时机添加 source 来统一管理源地址,源不存在时可自动添加,注册插件如下:
Pod::HooksManager.register('cocoapods-lebbay', :source_provider) do |context|
    sources_manager = Pod::Config.instance.sources_manager
    context.add_source(sources_manager.private_source)
    context.add_source(sources_manager.public_source)
end
- 闭包参数 context 对象提供了 add_source 方法用于添加 source 对象,这里借鉴 CocoaPods 源码做法,给 Pod::Source::Manager 扩展了两个方法分别提供私有源和公有源:
module Pod
class Source
class Manager
# 私有源 source
def private_source
url = 'https:
source = source_with_url(url)
return source if source
Command::Repo::Add.parse(['lebbay-spec', url, 'master']).run
source_with_url(url)
end
# 公有源 source
def public_source
url = 'https:
source = source_with_url(url)
return source if source
Command::Repo::Add.parse(['master', url, 'master']).run
source_with_url(url)
end
end
end
end
② Podfile 内提供 dev_pods 自定义方法用于提测过程中实时拉取组件分支最新 commit
- 在组件开发过程中经常会修改几个 pod 的代码,需要一个个的将 pod 指向本地开发目录,在项目测试过程中又要将 pod 一个个指向提测分支,比如:
# 开发阶段
pod 'PodA', :path => '../PodA'
pod 'PodB', :path => '../PodB'

# 测试阶段
pod 'PodA', :git => 'https://xyz.com/ios/PodA.git', :branch => 'release/1.0.0'
pod 'PodB', :git => 'https://xyz.com/ios/PodB.git', :branch => 'release/1.0.0'
- 为了简化写法,我们提供了 dev_pods 方法,简化逻辑后思路大致如下:
def dev_pods(pods, branch = '')
    if branch.length > 0
        # 测试阶段
        pods.each do |name|
            pod name, :git => "https://xyz.com/ios/#{name}.git", :branch => "#{branch}"
        end
    else
        # 开发阶段
        development_path = File.read('./bin/.development_path').chomp
        pods.each do |name|
            pod name, :path => "#{development_path}#{name}"
        end
    end
end
- 在 ./bin/.development_path 文件里配置本地开发目录,dev_pods 方法的用法如下:
# 开发阶段
dev_pods ['PodA', 'PodB']

# 测试阶段
dev_pods ['PodA', 'PodB'], 'release/1.0.0'
- 在测试阶段还有一个问题是,我们希望在组件的提测分支上修改了 bug、提交 commit 之后主工程 pod install 即可拉取最新代码。但因为 Podfile.lock 文件的存在,pod install 之后会把 commit 节点记下来,除非在提交 pod 改动后,再去更新主工程的 Podfile.lock 文件,否则是不会拉取最新代码的。为了实现这一需求,在 dev_pods 方法里修改了 Podfile.lock 文件,删掉 commit 节点信息,这样在拉取对应 pod 组件的时候就会拉取最新代码了。
- 在应用过程中发现的另一问题是:tag 冲突,当组件 PodA 指向的 release/1.0.0 分支里 podspec 里的版本号是 0.0.9,那么主工程的 Podfile.lock 文件里记录的就是 0.0.9。当测试完成,组件 podA 发版修改版本号为 1.0.0 并提交到了 release/1.0.0 分支里,这时主工程再执行 pod install 就会报 tag 冲突。为解决这一问题,避免提测组件版本号变更影响主工程提测打包,可以的做法是如果 PodA 通过 dev_pods 方法指向了分支,那么在 dev_pods 里删掉 PodA 在 Podfile.lock 里的记录(只删除 version、branch、commit 信息即可),这样在 pod install 的时候就会像下载一个新的 pod 一样。
- 问题、需求及解决思路大致如上,在以前的方案是写个 ruby 文件(lebbay.rb) 放在主工程目录,在 Podfile 里 require ‘./bin/lebbay.rb’,修改 Podfile.lock 文件也是脚本遍历文件内容操作字符串,现在统一整合到 cocoapods-lebbay 插件里,为 Podfile 扩充 DSL 方法,修改 Podfile.lock 文件可以直接使用 cocoapods-core 提供的 Lockfile 类及其方法:
module Pod
  class Podfile
    module DSL

    public

    def dev_pods(pods, branch = '')
      if branch.length > 0
        pods.each do |name|
          pod name, :git => "https://xyz.com/ios/#{name}.git", :branch => "#{branch}"
        end
        pull_latest_code_and_resolve_conflict(pods)
        puts "lebbay: using remote pods with branch: #{branch}".green
        else
        # 自定义开发目录
        development_path = Config.instance.dev_pods_path
        pods.each do |name|
          pod name, :path => "#{development_path}#{name}"
        end
        puts "lebbay: using local pods with path: #{development_path}xxx".green
      end
    end

    #--------------------------------------#

    private

    def pull_latest_code_and_resolve_conflict(pods)
      # 1、Podfile.lock
      rewrite_lock_file(pods, Config.instance.lockfile_path)
      # 2、Manifest.lock
      rewrite_lock_file(pods, Config.instance.sandbox.manifest_path)
    end

    def rewrite_lock_file(pods, lock_path)
      return unless lock_path.exist?
      lock_hash = Lockfile.from_file(lock_path).to_hash

      # 1、PODS
      lock_pods = lock_hash['PODS']
      if lock_pods
        target_pods = []
        lock_pods.each do |pod|
          if pod.is_a? Hash
            first_key = pod.keys[0]
            first_value = pod.values[0]
            if (first_key.is_a? String) && (first_value.is_a? Array)
              next if is_include_key_in_pods(first_key, pods)
              dep_pods = first_value.reject { |dep_pod| is_include_key_in_pods(dep_pod, pods) }
              target_pods << (dep_pods.count > 0 ? {first_key => dep_pods} : first_key)
              next
            end
            elsif pod.is_a? String
            next if is_include_key_in_pods(pod, pods)
          end
          target_pods << pod
        end
        lock_hash['PODS'] = target_pods
      end

      # 2、DEPENDENCIES
      locak_dependencies = lock_hash['DEPENDENCIES']
      if locak_dependencies
        target_dependencies = []
        locak_dependencies.each do |dependence|
          if dependence.is_a? String
            next if is_include_key_in_pods(dependence, pods)
          end
          target_dependencies << dependence
        end
        lock_hash['DEPENDENCIES'] = target_dependencies
      end

      Lockfile.new(lock_hash).write_to_disk(lock_path)
    end

    def is_include_key_in_pods(target_key, pods)
      pods.each do |pod|
        if target_key.include? pod
          return true
        end
      end
      return false
    end

    #--------------------------------------#
  end
end
end
- 我们同时修改了 Pods/ 文件夹下的 Manifest.lock 文件,是因为 CooaPods 在 pod install 过程中会对比 lock 文件里记录的 version 版本号,若 Manifest.lock 文件里记录的版本没变的话,在执行 pod install 时 Pods/ 文件夹里对应 Pod 的代码很可能是不会更新的。其中关于开发目录(development_path = Config.instance.dev_pods_path),给 Pod::Config 扩展了两个方法:设置开发目录 & 读取开发目录:
module Pod
  class Config

    # 读取目录
    def dev_pods_path
      config_path_file = dev_pods_path_config_file
      dev_path = File.read(config_path_file).chomp
    end

    # 设置目录
    def config_dev_pods_path(dev_path)
      raise Informative<


