前言:
上一期我们通过学习知道了自动配置原理,其实创建一个自定义SpringBoot Starter也很简单。
目录
如何自定义一个SpringBoot Srarter?
首先创建一个项目,命名为demo-spring-boot-starter,引入SpringBoot相关依赖
编写配置文件
自动装配
配置自动类
测试
如何自定义一个SpringBoot Srarter?
首先创建一个项目,命名为demo-spring-boot-starter,引入SpringBoot相关依赖
            org.springframework.boot
            spring-boot-starter


            org.springframework.boot
            spring-boot-configuration-processor
            true
-
编写配置文件
这里定义了属性配置的前缀
@ConfigurationProperties(prefix = "hello") public class HelloProperties { private String name; //省略getter、setter } -
自动装配
创建自动配置类HelloPropertiesConfigure
@Configuration @EnableConfigurationProperties(HelloProperties.class) public class HelloPropertiesConfigure { } -
配置自动类
在
/resources/META-INF/spring.factories文件中添加自动配置类路径org.springframework.boot.autoconfigure.EnableAutoConfiguration= cn.fighter3.demo.starter.configure.HelloPropertiesConfigure -
测试
至此,随手写的一个自定义SpringBoot-Starter就完成了,虽然比较简单,但是完成了主要的自动装配的能力。
-
创建一个工程,引入自定义starter依赖
cn.fighter3 demo-spring-boot-starter 0.0.1-SNAPSHOT -
在配置文件里添加配置
hello.name=张三 -
测试类
@RunWith(SpringRunner.class) @SpringBootTest public class HelloTest { @Autowired HelloProperties helloProperties; @Test public void hello(){ System.out.println("你好,"+helloProperties.getName()); } } -
运行结果
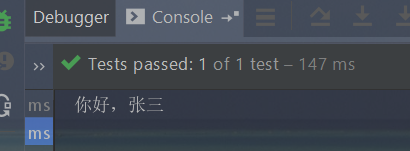
运行结果
-


